By Ann West
These four easy restorative yoga poses can be practiced independently or together in the sequence below. If time is short, it’s preferable to practice fewer poses for longer holds, so the body and mind have a chance to completely rest in each position.
Practice Tips
Darkness: Try using an eye cover of some kind – a small towel or scarf will do. Darkness triggers a raise in levels of the sleep hormone melatonin, which in turn signals your muscles to relax, your body temperature to fall, and a more restful mind state.
Warmth: You’ll relax even more deeply if you stay warm. Because your body temperature lowers when you relax, dress in layers and maybe a pair of socks, or cover yourself with an extra blanket. You can always remove them if you get too warm.
Comfort: Above all the poses should be comfortable. Restorative yoga poses aren’t practiced so much for intense stretching as they are for the supported opening they provide to gently release tension. Being comfortable will help you stay a little longer and reap their deeper physiological benefits. If you begin to feel uncomfortable simply readjust yourself, perhaps adding an extra blanket or block here or there for support.
Pain: You should feel at ease as you remain in the positions and only stay as long as you feel peaceful. Do not tolerate pain or discomfort, especially in the joints. If pain arises, change your set-up or try another pose. Over time, the more you return to your restorative yoga practice, the more at home you’ll feel resting for longer periods of time.
Face and breath: In all the poses relax your face, especially the jaw, brow, and around the eyes. Keeping your face passive helps draw the attention inward and calms the mind. The breath can be slightly longer than usual, and steady and rhythmical. Try quietly watching the rhythm of your breath to help settle the mind.
Adho Mukha Svastikasana
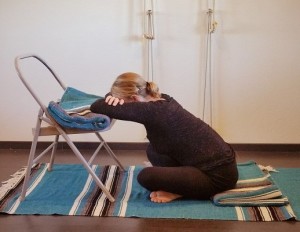
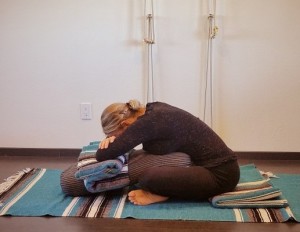
Downward facing auspicious pose. Benefits: Releases tension in the hips, back and neck. Soothes the nerves and quiets the mind.
- 1. Sit upright from the base of the spine
- 2. Flex forward at the hips to the chair
- 3. Or use a bolster or blankets for support
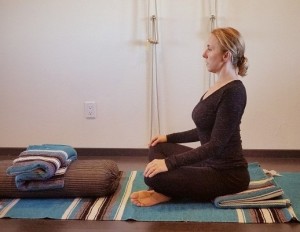
1. Sit on a high enough blanket so that the pelvis doesn’t tilt backwards. The back of the pelvis, the sacrum, should be perpendicular to the floor.
2. Flex at the hips and lengthen the torso forward to rest the head and arms on the chair. Relax the hips, back, neck and shoulders. Let the face be passive and the breathing soft and easy. Stay for 3-5 minutes, then come up and switch the cross of the legs and repeat on the second side.
3. If you’re more flexible, use a bolster and/or blankets to support your abdomen, chest, head and arms.
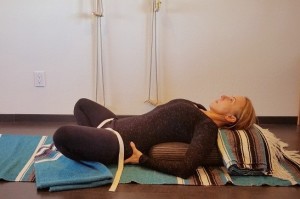
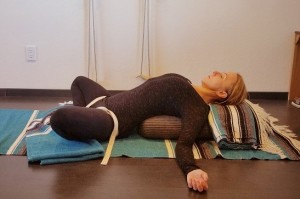
Supta Baddha Konasana
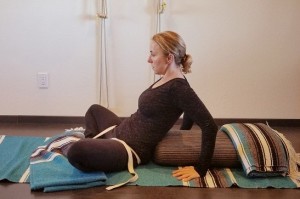
Supine bound angle pose. Benefits: Opens the chest and hips, and gently stretches the abdomen and pelvic organs.
- 1. Extend your trunk back
- 2. Use your hands to lengthen your buttocks
- 3. Roll the arms out and spread the chest
1. Place a belt around your lowest back, over your thighs, and under your feet. The knees should feel comfortable. Wrap a blanket around your ankles for support. Use your arms as you lie back to help extend and stretch your spine over the bolster or blankets.
2. Use your hands to slide your buttocks towards your feet to release and lengthen the lower back.
3. Adjust the shoulder blades away from the neck and roll the upper arms out so the palms are face up. Rest the arms wide. The chest and shoulders should feel broad and open. Gently expand your chest as you inhale and soften your abdomen as you exhale. Stay for up to 5-10 minutes.
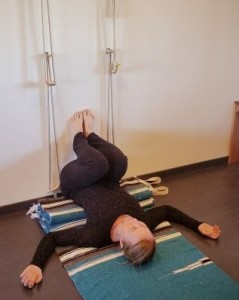
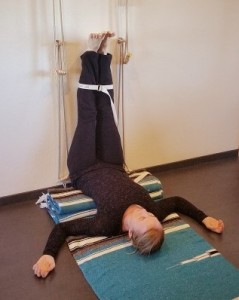
Viparita Karani
Inverted action pose. Benefits: Relaxes and drains the legs. The heart has less work pumping blood from the legs and is able to rest. Calming and soothing for the nerves and helps relieve anxiety.
- 1. Rest the hip on the edge of the blanket
- 2. Roll on to the blankets from your side
- 3. Stretch the legs up the wall
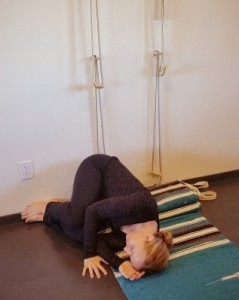
1. Place two or three narrow folded blankets several inches from the wall.
2. Roll into the pose from your side so your lower back is supported by the blankets and your buttocks slightly curl into the gap between the blankets and the wall.
3. Stretch your legs up the wall. If the blankets feel too high to be comfortable, remove one or all. Try placing a strap around your shins or thighs to help support your legs. Roll the arms out to open the chest. The abdomen should be soft, relaxed and parallel to the floor. Rest here for 5-10 minutes.
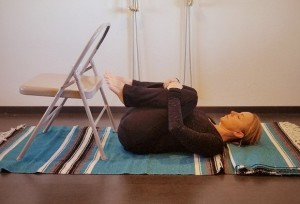
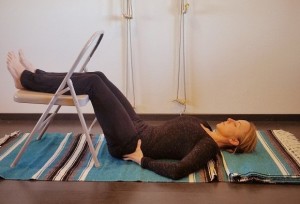
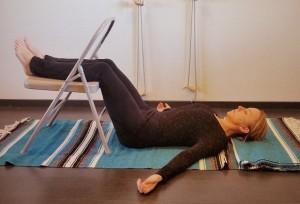
Chair Savasana
Chair corpse pose. Benefits: Relaxes the lower back and whole length of the spine. Deeply restful.
- 1. Hug the legs in to release the lower back
- 2. Push the buttocks towards the chair
- 3. Roll the arms out at the shoulders
1. Hug your legs into your trunk to help lengthen and release the lower back.
2. Place your legs on the chair seat and use your hands to push the buttocks to the chair to further release the back.
3. Adjust the shoulder blades away from the neck and roll the upper arms out so the palms are face up. Rest the arms wide. Gently extend your exhalations to relax more deeply. Rest here for 5-15 minutes.
For more on restorative yoga: Restorative Yoga: 6 Excellent & Healthful Reasons to Practice
Connect
For more yoga articles, updates, classes and workshops, sign up for my newsletter at the top of the page or like on Facebook at Ann West :: Iyengar Yoga. You can contact me directly by email or call (858) 224-2484.
© 2015 Ann West. All rights reserved.
