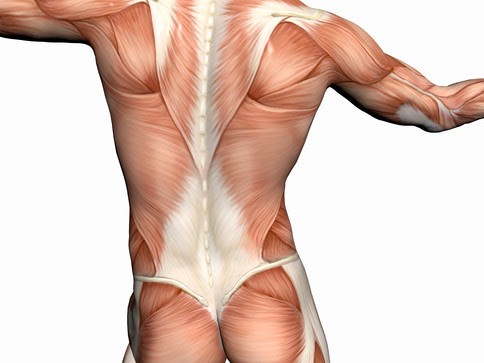
 By Ann West
This is part 3 of 3 part a series on Spinal Stabilization.
Creating spinal stability
The key to this approach is to improve the nervous system’s ability to activate the pelvic floor (PF), transversus abdominus (TrA) and multifidus (MF) correctly. This is achieved by learning to voluntarily activate these muscles in near perfect isolation.
The exercises below are designed to retrain the nervous system more so than the muscular system. They may feel unusual at first because they are to be practiced gently with minimal exertion.
Rehabilitation steps
Successful spinal stability should be learned progressively:
- Learn how to isolate and contract each inner layer muscle group (stages 1-3 below).
- Strengthen by ‘co-contracting’ them with each other, i.e. the PF, TrA and MF all contracting at the same time (stage 3 below).
- Further strengthen your inner layer while carefully moving the limbs with therapeutic stabilization exercises. Keep your central focus on maintaining a stable co-contraction of the inner layer muscles (stage 4 below).
- Learn to integrate this co-contraction into other sitting and standing positions and movements in any conscious exercise regimen.
Key pointers for all exercises
Please review the key pointers below for before you begin to practice the spinal stability exercises.
Actions
- Breathe quietly and normally.
- Move slowly so the nervous system can keep track of the movements. Be more concerned with quality of movement over quantity of movement.
- Enjoy the sensation of connecting deeply to your spine and the meditative quality of the movements.
- No movement in your hips, pelvis or spine should occur as you practice the exercises.
- Keep the buttocks, other abdominal muscles and large back muscles relaxed throughout.
Repetitions
- Perform only as many repetitions as you can without pain while maintaining excellent technique.
- Do not overwhelm your current capabilities. If you go beyond your capacity the outer layer muscles will begin to compensate, leading back into the faulty movement patterns you are trying to retrain.
- Pause and rest when you feel the need: hug your knees into your chest; or lie out flat; or lean you knees together.
- It is tempting to progress through the exercise levels quickly, but please be sure you are completely capable of performing each exercise correctly before moving on to the more challenging variations. Have patience and work gradually.
Timing
- At first, plan on working for a maximum of 10 minutes. It may be difficult to maintain the concentration required for longer than this.
- Work for short periods but frequently – 2 or 3 times per day minimum, 5 or 6 is great.
- If after a few minutes of successful practice you are no longer able to ‘get it,’ the muscles are likely tired. Stop and try again later.
- You should not feel any pain whatsoever while performing these exercises. Pain is not something that must be worked through to get better!
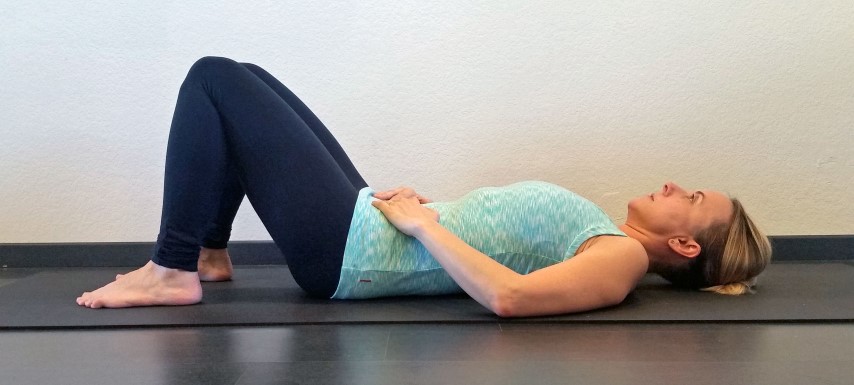
Stage 1: isolated pelvic floor activation
The pelvic floor (PF) is a diamond shaped group of muscle and connective tissue located at the base of the pelvis. It attaches to the pubis at the front, the tailbone at the back, and the inner pelvis on the right and left sides.
Pelvic floor activation
- Lie on your back with your knees bent and feet slightly apart.
-
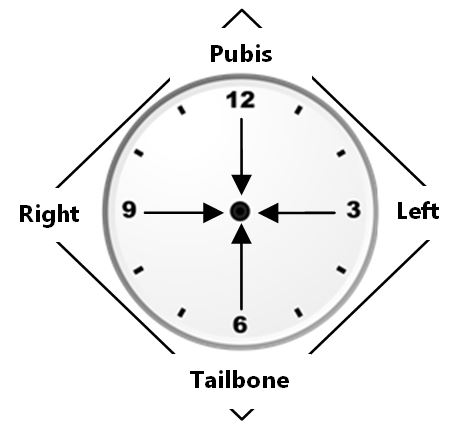
Imagine the diamond shaped pelvic floor as a clock face: 12 o’clock is at the pubis; 6 o’clock is at the tailbone; 3 o’clock is on the leftt side; and 9 o’clock on the right side.
a. Imagine a line from each of these four points pulling to the center of the clock face.
b. Keep the pelvis still and the buttock muscles relaxed.
c. Then pull the center point up into your body like a drawstring being pulled up.
d. Hold for 10 seconds, then release and repeat 10 times.
Stage 2: isolated transversus abdominis activation
The transversus abdominis (TrA) is the deepest abdominal muscle. Built like a corset around your trunk, it is the only abdominal muscle that attaches to your spinal joints. It is normally the first muscle the nervous system to activate during any type of movement.
To develop an isolated TrA contraction, we must make use of a neurological link between the TrA and PF muscles. The TrA activates independently of the other abdominal muscles when we gently contract the pelvic floor muscles.
Tranversus abdominis activation
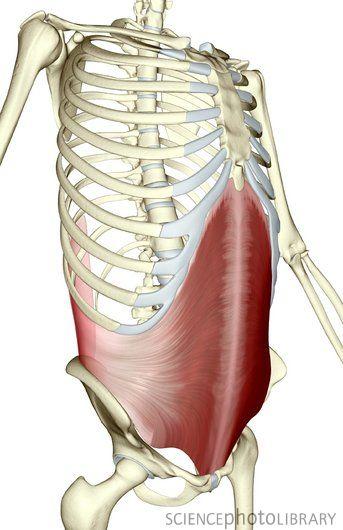
Transversus abdominis
1. Lie on your back with your knees bent and feet slightly apart.
2. Once you have gained a good ability to activate the PF, pay attention to the TrA.
3. Place your fingertips just inside the pelvic bones at the lower abdomen so you can feel when the TrA activates.
4. Carefully activate the PF. Expect to feel a gentle firming under your fingertips without feeling that the muscle is bulging up.
5. The objective is to gain an isolated activation of the TrA. This is key to correcting any nervous system problems with these important stabilizing muscles.
6. Only a very gentle activation is needed in order to activate the TrA in isolation and prevent the other abdominal muscles activating as well. To help feel whether the other abdominal muscles are remaining quiet, place one hand on your lower ribs – any muscles there should stay relaxed as you activate the TrA.
7. It may seem more convenient to do this sitting upright, but any upright posture requires many more muscles to activate and disallows isolating the TrA activation.
Stage 3: combined transversus abdominis & multifidus activation
The multifidus (MF) is a series of small muscles that connect to the vertebrae along much of the spine. The deep fibers are short and span across individual vertebral segments. The MF functions together with the PF and the TrA to stabilize the lower back BEFORE movements of the limbs occur, to help keep stress off of the spine during movement.
Multifidus activation
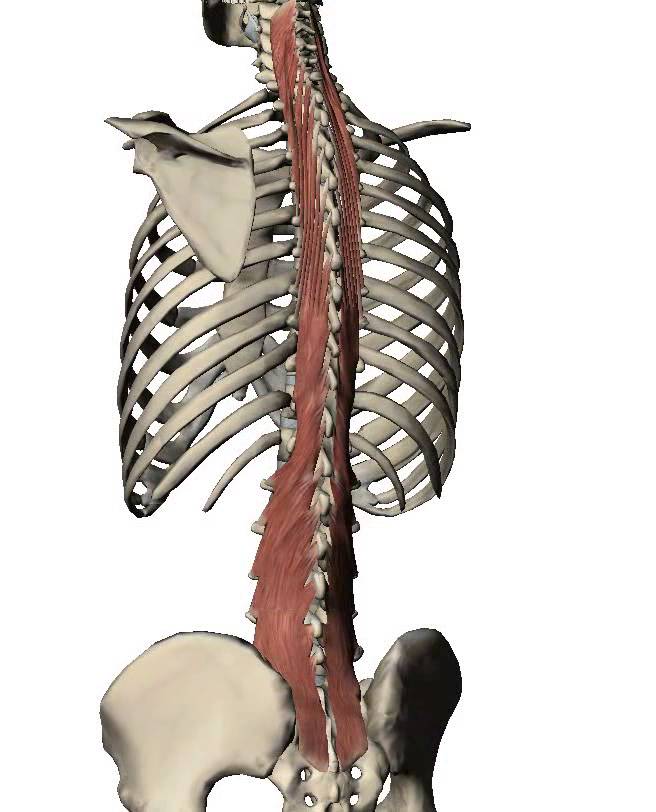
Multifidus muscles
1. Lie on your back with your knees bent and feet slightly apart.
2. The lumbar spine should maintain its neutral curve. It should not flatten into the floor or over-arch away from it:
a. Flattening the lower back rolls you onto the top of your sacrum and into the lumbar, deactivating the MF.
b. Arching your back rolls you more to your tailbone and lifts the lumbar, over activating the spinal extensors.
c. Position yourself on the point in between, at the center of the sacrum.
d. Remain there as you activate the MF using the following directions:
3. For the part of the MF that supports the sacroiliac joints (SIJ):
a. Imagine a line that connects your right and left SIJ.
b. Connect or draw the SIJ narrower along the line.
4. For the part of the MF that supports the lumbar/lower back:
a. Imagine a line that connects the back of the pubis to the MF in the part of your lower back you want to train.
b. Connect along that line and then gently extend the lumbar vertebrae 1mm above the one below.
Stage 4: therapeutic dynamic inner layer exercises
1. Heel slide
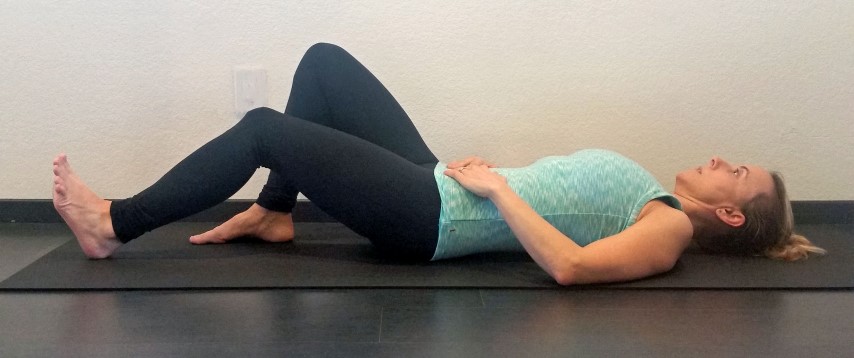 Maintain co-contraction of the inner layer muscles while sliding one heel along the floor.
- The pelvis should remain perfectly still.
- Use your fingertips to remind yourself to maintain tension in your lower abdomen.
- Only lower the leg for as long as you can maintain this tension.
- Alternate legs.
- Maintain easy breathing throughout.
- When you can do ten repetitions well, move on to the next exercise.
2. Knee to the side
-
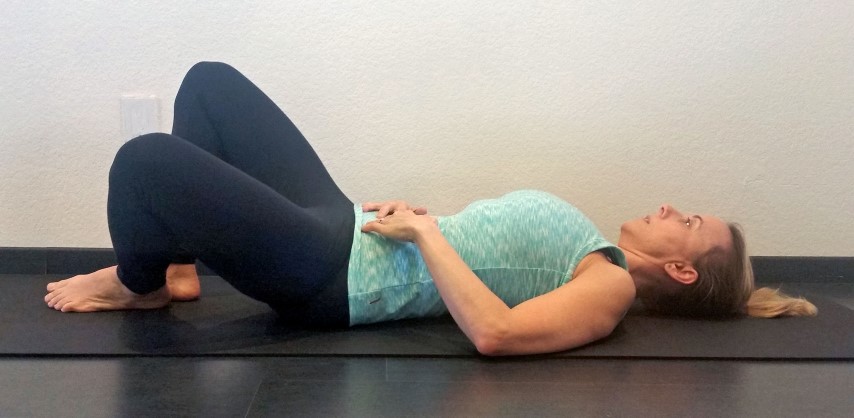
Maintain co-contraction of the inner layer muscles while letting the knee move out towards the floor.
- The pelvis should remain perfectly still.
- Use your fingertips to remind yourself to maintain tension in your lower abdomen.
- Only lower the leg for as long as you can maintain this tension.
- Alternate legs.
- Maintain easy breathing throughout.
- When you can do ten repetitions well, move on to the next exercise.
3. Slow arms over head
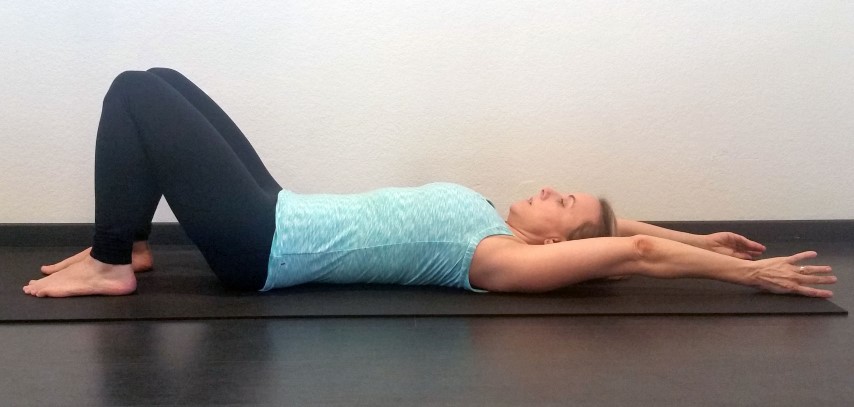 Maintain co-contraction of the inner layer muscles as you slowly reach your arms over your head.
- Only move your arms as long as you can maintain the co-contraction of the inner layer muscles.
- The pelvis should remain perfectly still.
- Do not allow the lower front ribs to lift as the arms move.
- Same instructions as the heel slide above.
4. Single knee lift
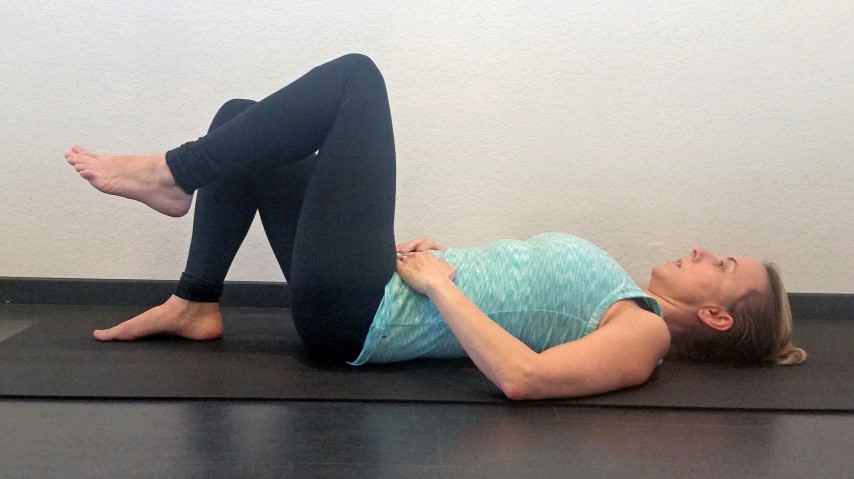 Maintain co-contraction of the inner layer muscles as you lift one foot off the floor.
- The pelvis should remain perfectly still.
- Alternate legs.
- Same instructions as the heel slide above.
5. The dying bug
- Maintain co-contraction of the inner layer muscles as you lift a leg and take the opposite arm over the head.
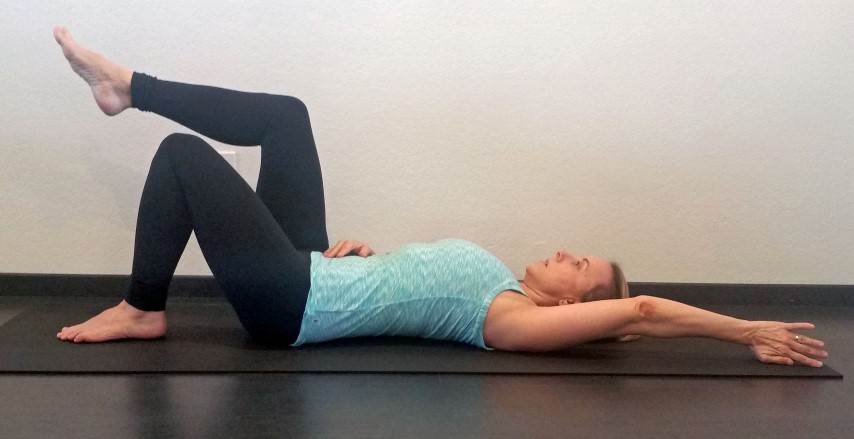 Alternate sides.
- Not too difficult once you have mastered exercises 3 and 4.
- Same instructions as the heel slide above.
6. Mini bird dog
- It may take several weeks or more practicing this pose before you can move on to pose 7 below.
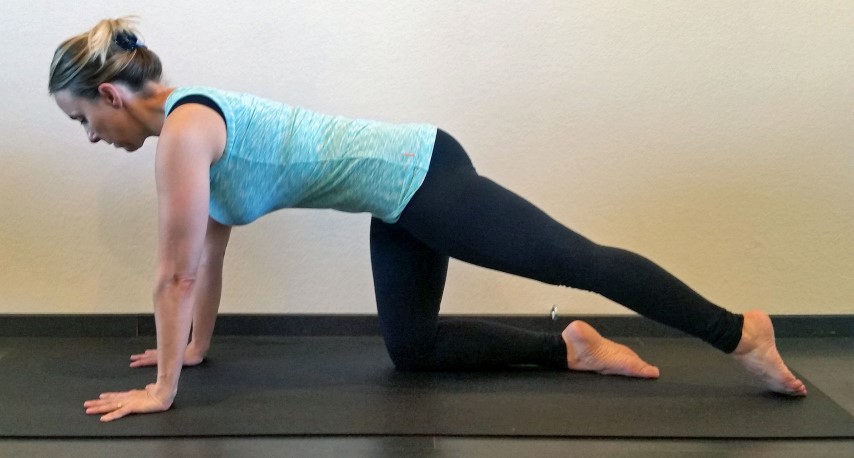 i. Legs: Kneel in an all fours position and co-contract your inner layer muscles. Narrow the knees and steadily slide one leg back along the floor. Alternate legs
ii. Arms: (see bird dog pic below). In an all fours position, lift one arm up by the ear with the palm facing to the midline. Alternate arms.
7. Bird dog
- Practice when you can perform the mini bird dog above correctly and consistently.
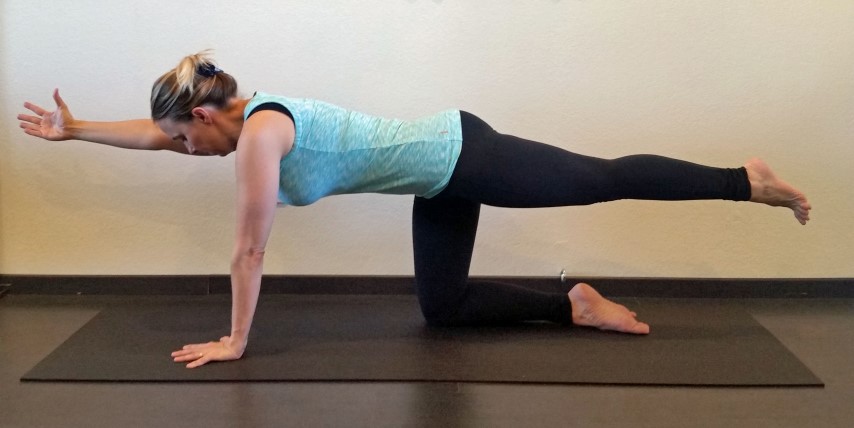
- Lift one leg from the floor as you stretch it back. Be careful not over use the larger back muscles to complete this action.
- Then add lifting the arm.
- Then lift the arm and leg simultaneously.
Connect
For yoga articles, updates, classes and workshops, sign up for my newsletter at the top of the page or like on Facebook at Ann West :: Iyengar Yoga. You can contact me directly by email or call (858) 224-2484.
© 2016 by Ann West. All rights reserved.
Leave a Reply